

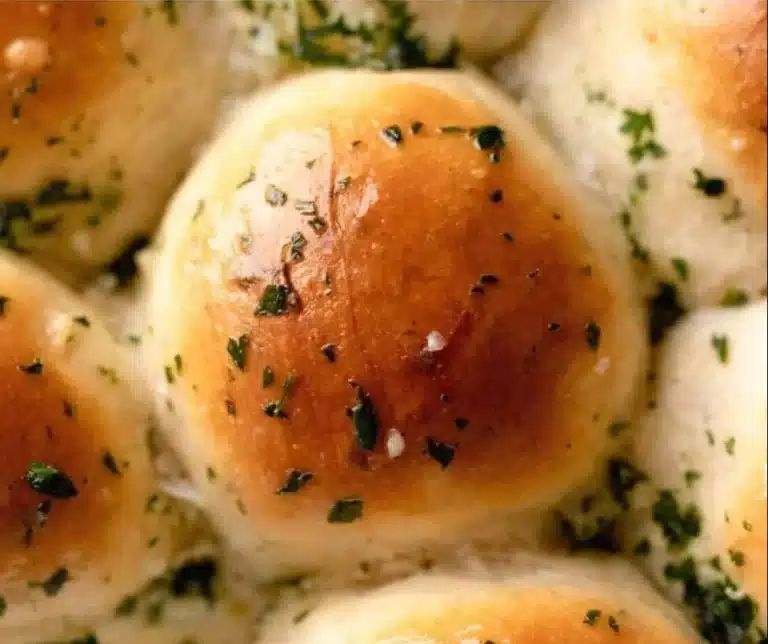
There’s nothing quite like the smell of freshly baked bread wafting through your kitchen, is there? These garlic butter bread rolls are not only a feast for the senses; they’re an instant crowd-pleaser. Soft, fluffy, and bathed in rich garlic butter goodness, they’re the ideal side to just about any meal—or perfect all on their own as a snack. Trust me, once you pull these from the oven, you might find they go faster than you can put them on the table.
Why you’ll love this dish
These rolls are the ultimate comfort food. They strike a lovely balance between chewy on the outside and pillowy soft on the inside. And let’s not forget about that garlic butter—it’s like a flavor hug for your taste buds. Whether you’re hosting a dinner party, looking to impress your family at a weekend gathering, or simply craving something delicious, these rolls fit the bill.
“I made these for my friends, and they disappeared in minutes! Unbelievably good!”
That’s what I want to hear from you, too! Plus, there’s something incredibly satisfying about making bread at home. The process involves just a few simple ingredients and a little time—and the payoff? Oh, it’s huge.
The cooking process explained
Making these garlic butter rolls is more straightforward than you might think. You’ll mix your ingredients, let the dough rise, shape those lovely little balls of goodness, and then bake them until golden. Total time might be about an hour and a half, including rising time, but trust me, the aroma alone is a game-changer.
Prep Time: 20 min | Cook Time: 15 min | Total Time: 1 hr 35 min
What you’ll need
Here’s your shopping list:
- Active dry yeast: Don’t use the old stuff hiding in the back. Fresh is key!
- Warm water: Not boiling, just warm enough to activate the yeast.
- All-purpose flour: Versatile and essential for that perfect texture.
- Sugar: A little sweetness goes a long way.
- Salt: Don’t skip this step; it enhances the flavor.
- Butter, melted: For richness and flavor.
- Garlic, minced: Fresh is best, but pre-minced works in a hurry.
- Parsley, chopped (optional): For a pop of color and flavor.
You might already have most of these at home. If you want to mix things up, substitute some of the all-purpose flour for whole wheat for a nuttier taste!
Step-by-step instructions
Activate the yeast: In a mixing bowl, combine your warm water and sugar. Stir in the yeast and let it sit for about 5-10 minutes until it’s bubbly. This step matters more than you think!
Make the dough: Gradually mix in the flour and salt. You can start with a spoon and then switch to your hands. Work until you have a smooth dough—about 5 minutes of kneading.
First rise: Place the dough in a buttered bowl, cover it with a kitchen towel, and let it rise in a warm spot until doubled—about 1 hour.
Shape the rolls: Punch down the risen dough and divide it into 12 even pieces. Shape each into a ball and place them in a greased baking dish.
Second rise: Cover again and let rise for another 30 minutes until puffed.
Prepare the garlic butter: In a small bowl, mix melted butter with minced garlic. Brush this over the rolls before baking.
Bake: Preheat your oven to 375°F (190°C). Bake the rolls for 15-20 minutes until golden brown.
Final touch: Brush with more garlic butter as soon as they come out of the oven.
Best ways to enjoy it
These rolls aren’t just for show. They pair beautifully with almost any dish—think alongside a hearty soup, a fresh salad, or slathered in butter for a brunch treat. They can also make a fantastic base for sliders if you’re feeling adventurous.
And let’s be real: they’re absolutely delectable right out of the oven, so don’t hesitate to dig in!
Storage and reheating tips
Got leftovers? Place the rolls in an airtight container once they’re completely cool. They’ll last for about 2 days at room temperature or up to a week in the fridge. If you want to freeze them, simply wrap them tightly and store for up to 3 months. To reheat, pop them in a low oven for about 10 minutes, and they’ll be warm and lovely again in no time.
Helpful cooking tips
When it comes to making rolls, patience is your friend! Allowing the dough to rise adequately is crucial for that fluffy texture we all want. Your kitchen should be warm, but not hot—if it’s too warm, the yeast can over-rise and cause issues. And don’t skimp on the garlic butter; it’s where the magic really happens!
Creative twists
Feel free to get creative with flavor! Try adding different herbs like rosemary or thyme to the garlic butter for a gourmet touch. Cheese lovers can fold in some shredded cheese into the dough before shaping—yes, please! Or, for a sweet version, skip the garlic and top with cinnamon sugar instead.
FAQ
Can I use whole wheat flour instead?
Absolutely! Just start with half whole wheat and half all-purpose to maintain the rolls’ light texture.
What if my dough doesn’t rise?
Check your yeast! If it didn’t bubble when you activated it, it might be dead. Also, ensure your kitchen is warm enough—try placing it in a sunny spot.
Can I make these ahead of time?
Yes! You can prepare the dough, shape the rolls, place them in the baking dish, and refrigerate overnight. Just let them come to room temperature and rise before baking.
There you have it—deliciously garlic-infused rolls ready to become your new favorite baking project. Give them a go, and I promise you’ll wonder how you ever lived without them!
Print
Garlic Butter Bread Rolls
- Total Time: 95 minutes
- Yield: 12 servings 1x
- Diet: Vegetarian
Description
Soft and fluffy garlic butter bread rolls that are a perfect side for any meal.
Ingredients
- 2 1/4 teaspoons active dry yeast
- 1 cup warm water
- 3 cups all-purpose flour
- 2 tablespoons sugar
- 1 teaspoon salt
- 1/4 cup butter, melted
- 4 cloves garlic, minced
- 2 tablespoons parsley, chopped (optional)
Instructions
- Activate the yeast: In a mixing bowl, combine your warm water and sugar. Stir in the yeast and let it sit for about 5-10 minutes until it’s bubbly.
- Make the dough: Gradually mix in the flour and salt. You can start with a spoon and then switch to your hands. Work until you have a smooth dough—about 5 minutes of kneading.
- First rise: Place the dough in a buttered bowl, cover it with a kitchen towel, and let it rise in a warm spot until doubled—about 1 hour.
- Shape the rolls: Punch down the risen dough and divide it into 12 even pieces. Shape each into a ball and place them in a greased baking dish.
- Second rise: Cover again and let rise for another 30 minutes until puffed.
- Prepare the garlic butter: In a small bowl, mix melted butter with minced garlic. Brush this over the rolls before baking.
- Bake: Preheat your oven to 375°F (190°C). Bake the rolls for 15-20 minutes until golden brown.
- Final touch: Brush with more garlic butter as soon as they come out of the oven.
Notes
These rolls can also be frozen for up to 3 months. Reheat in a low oven for about 10 minutes.
- Prep Time: 20 minutes
- Cook Time: 15 minutes
- Category: Side Dish
- Method: Baking
- Cuisine: American
Nutrition
- Serving Size: 1 roll
- Calories: 150
- Sugar: 2g
- Sodium: 200mg
- Fat: 7g
- Saturated Fat: 4g
- Unsaturated Fat: 3g
- Trans Fat: 0g
- Carbohydrates: 18g
- Fiber: 1g
- Protein: 3g
- Cholesterol: 20mg
Keywords: garlic bread, bread rolls, baking, homemade bread, side dish